
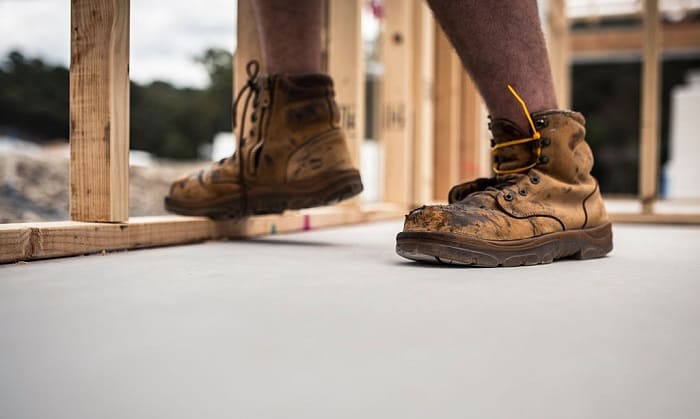
I think every person must have experienced an embarrassing trip or slip at least once in a lifetime. At least I have, multiple times. In the past, non-slip shoes were only for those who worked under harsh conditions like hazardous workplaces, offshore oil rigs, and muddy terrain in the forests.
However, shiny and polished floors seem to be a trend nowadays. They are at the supermarkets, hospitals, malls, and office buildings. More than ever, we all need slip-resistant shoes.
The good news is you don’t have to invest a few hundred dollars in anti-slip shoe designs. With the right tricks, you will be able to make shoes non-slip for work. You can abrade the soles with a nail file or sandpaper. Another option is to use traction spray. Also, some products that I found extremely helpful in the long term are non-slip sole pads, anti-slip tape, and ankle straps.
But how to buy the best products and optimize the results? Let’s get into the details on how to make shoes slip resistant for work!
Table of Contents
What You Will Need
1. Your shoes
You will certainly need your shoes to make them slip-resistant. Before jumping right to the next step, wear the shoes and identify the cause of the slips. Slippery outsoles are not always the reason. Oftentimes it is more about the fitting and the way you put the shoes on.
- The laces are not tightened properly: Before tightening shoe laces, push your heel all the way back firmly until it touches the shoe. Then, lace tightly in a way that is comfortable. The shoes should fit snugly, not tight. Many people don’t push their heels when tightening shoe laces. That leads to heel slippage, unbalanced steps, and eventually trips and slips.
- The shoes are too long: When buying shoes, we often pay more attention to the width than the length, thinking the length is not as important. However, it is the unnecessary length that will cause slips.
A simple solution is to insert heel grips or pads. If the shoes are still too large, footbeds and thick socks can help them fit better. If all of these don’t work, you might have to get rid of the shoes. They are not the right size.
After ensuring your shoes are the right fit and you tighten the laces properly, try walking around in them on slippery surfaces. If slips and trips still occur, gather the following for slippery shoes remedies.
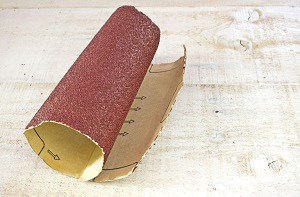
2. A nail file or a piece of sandpaper
You will need a nail file or a piece of sandpaper to rub against the outsoles and make them less slippery. If the soles are from sturdy materials, you must prepare a metal nail file, not regular thin and fragile ones. A small piece of sandpaper can get the job done too. It’s best to use 50-grit sandpaper. In case you only have finer ones, they can be used but the process might take longer.
The method works best for more cardboard-like and natural outsole textures, such as flats and sandals. Though this method is easy and cost-effective, be aware that once rubbed by sandpaper or nail files, the shoe soles will lose their color and might look unpleasant. Skip this step if you don’t want to damage the look of the outsoles. We have other techniques you can use.
3. A traction spray bottle
Grip spray bottles are made for athletic activities. They are used to spray on fingertips to enhance precision in ball handling, as well as on handles of tennis racquets or baseball bats to improve tackiness and grip. Some people use them to spray on the floor to enhance floor gripping. If you have a traction spray bottle at home, similar ideas can be applied for your boot outsoles.
This method is quick and does no harm to the outsoles. But the sticky effect won’t last long, especially when encountering dirty terrain.
4. Non-slip sole pads
Non-slip shoe pads are often sold in a package of four or six. Check the materials before you buy, best is odor-free and durable silica gel. Some non-slip pads have a bad rubber smell. Also, make sure they can stick well. Pads without great adhesion can fall off the outsoles and be extremely annoying.
Besides, the pads should be suitable for your shoe colors, designs, and materials. For instance, for brown leather outsoles, buy dark-colored pads that adhere well to the leather. If the pads are too bright, it might look like you step on pieces of paper and wear them around.
5. Ankle straps
Slips occur more often in laceless shoe styles like flats, heels, platforms, and stilettos. A quick fix is to “lace them up” with detachable ankle straps. The straps will assure proper fitting, firm steps, and foot support.
Similar to non-slip pads, pay attention to the length, colors, and designs when purchasing. Make sure they fit the ankle and go well with your shoes. The right straps will elevate your look while keeping you away from the discomfort of unfitted shoes.
6. Anti-slip tape
The last option is to use anti-slip tape. The tape will provide extra foot traction so you can walk confidently even on slippery surfaces. For a temporary fix on the go, you can use adhesive bandages in replacement of anti-slip tape. But being made without much adhesion, bandaids won’t stick onto the outsoles for long.
Steps to Make Shoes Non-slip for Work
Step 1: Allow the shoes to wear down naturally
It’s normal for new shoes to cause slips. Don’t use external products right after purchasing. Instead, take your time to break in new footwear. Once worn down, shoes are naturally less slippery.
For casual shoe styles like sneakers, flats, or crocs, put them on and walk around for 15 to 20 minutes a day for about a week. This will help the shoes to soften, flex into your foot shape, and make sneakers less slippery. After a few days, your feet will start to feel much more pleasant and comfortable. During the break-in period, slight blister spots can happen here and there. Stick a band-aid on the wounded area.
For heavy-duty work boots, there are a few more steps to further the break-in process:
- Walk outside on uneven terrain and stairs.
- Use a leather conditioner to soften and stretch the uppers.
- Bend the boots back and forth.
- Insert shoe stretchers into the boots and leave for about six to eight hours.
After breaking in, if shoes stay stiff and slippery, enhance their grip with the following steps.
Step 2: Abrade the soles
Use the nail file or sandpaper you’ve prepared to abrade the outsoles. Again, this step can discolor the paint on the soles, so be mindful about that. Otherwise, all you need to do is to take the shoes off your feet and abrade them. Rub the sandpaper or nail file against the portions that contact the floor.
Don’t overdo it as your shoes will naturally wear down over time. You don’t want the outsoles to become super thin after a short period of use.
Step 3: Use non-slip spray
As said, non-slip spray is not a permanent fix. But they can be excellent for when you are short in time. Here is how you go about it:
- Wipe the outsoles quickly with a dry, clean cloth to get rid of dirt and dust.
- Spray a generous amount of product onto the outsoles.
- Leave them dry for a few minutes.
Step 4: Attach non-slip soles or anti-slip tape
If you choose to buy non-slip soles or anti-slip tape, follow the instruction to stick them on:
- Clean the shoe soles thoroughly.
- Leave them air dry in a cool place.
- Remove the plastic film if there is and press the shoe pads or tape onto the outsoles. You should use two pads per outsole, one for the ball area and one for the heel.
- Gently put the shoes on and stand for a few minutes to enhance the adhesion.
Step 5: Attach ankle straps
If you choose to buy ankle straps, go ahead and attach them to the shoes following the product instruction. Most straps come with adhesive pads so you can stick them onto the heel counter. Remember to wipe off the dust on the area before attaching. With the help of ankle straps, you can expect balanced and firm steps while being busy at workplaces.
You can also watch this video about how to make shoes slip resistant for work:
Conclusion
To sum up, making shoes slip-resistant is not difficult at all. The demand for non-slip work shoes has increased lately. Even staff at the supermarkets and office buildings should wear slip-resistant work boots. Whatever techniques you choose to make shoes slip-proof, always ensure safety by lacing up your shoes carefully and only wearing properly-fitted footwear.

Veronica is our content editor. She is a talent in delivery. Her main work is editing and writing articles that are both informative and simple to follow. She is in charge of synthesizing our understanding of what personal protection equipment (PPE) is needed in each job, how to best apply it, and how to visualize that equipment.