
Severe injuries and fatalities caused by the lack of access to personal fall arrest systems should never be overlooked. In the US, the National Institute for Occupational Safety & Health (NIOSH) says that falls comprise 36.4% of the total deaths in the construction industry.
That said, it is equally important to ensure that the harnesses employers procure fit their workers well and are worn correctly. Otherwise, these devices can harm them when arresting the fall. Be sure to learn how to put on a safety harness properly to prevent injuries.
Table of Contents
Step-by-step to Put on a Safety Harness Properly
1. Before wearing harnesses
The Occupational Safety and Health Administration (OSHA) mandates all employers to have every component of fall protection equipment inspected thoroughly at least once a year by an authorized ‘Competent Person.’ This ensures that workers wear a safety harness that is up-to-date and meets the requirements.
More importantly, employers must provide their employees with fall protection harness training to ensure they know how to wear them and inspect them before each use.
Per OSHA’s guidelines, here are the parts that need to be inspected to use the harness safely:
01 Webbings and ropes
Perform visual and touch inspection and look for signs of wearing such as:
- Missing straps
- Parts that are modified by the user
- Discoloration (Note that all forms of discoloration are an indication of damage so be sure to check the cause)
- Heat damage:
- Burnt, charred, or melted fibers
- Brittleness or hardness
- Stiff and shiny areas
- Cracks or damage in the fibers
- Cuts or tears
- Fraying
- Mildew
- Damage due to chemical exposure
- UV degradation
- Damage on stitchings
- Cuts in the stitches
- Pulled threads or stitchings
- Missing stitching
- Stiff and shiny areas due to heat damage
02 Hardware
Check the D-rings, buckles, and other metal and plastic parts by looking at and touching them. The hardware fails the inspection if you see the following:
- Corroded metals
- Deformities, nicks, cracks, and breaks on the plastic and metal parts, including grommets and loops
- Damaged buckles
- Loose rivets
- Twisted frames or tongues
- Protruding sharp parts that can potentially harm the user
- Broken or malfunctioning springs
- Sharp or abrasive edges
- Parts that are modified by the user
03 Labels or tag systems
On average, harnesses can be used for up to five years or even 10 years, depending on the model. Therefore, it is a crucial step in harness safety inspection to check the labels and tags.
Ensure that the labels and tags legibly show the manufacturer’s name, date of manufacture, model, warnings, and limitations in usage. The harness must be removed from service if:
- It is past the service life policy
- The tags and labels are missing or illegible
If all components are in good condition, you can proceed with checking the harness fitting guide to confirm that it fits you properly.
2. Reminders
- Employees that have not undergone safety harness training are not allowed to use safety harnesses.
- Remove the harnesses from service:
- If the user is not sure whether the spots or marks are signs of damage
- If the harness was involved in catching a fall in the past and has not been inspected by a competent person
- If the device has expired or was not tested
- Prohibit the staff from modifying the fall protection system, i.e adding grommets or writing on the strap with a marker.
- Do not allow employees to wear harnesses that do not fit them well.
- Assign a storage space for the harnesses that can protect them against sunlight and other conditions that may compromise their quality and ability to arrest a fall.
Instructions on Putting on a Harness
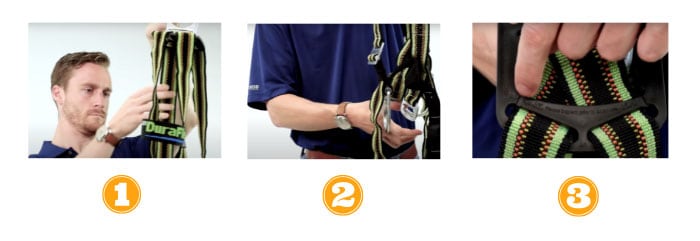
Step 1: Grab the harness by the dorsal D-ring and undo the buckles
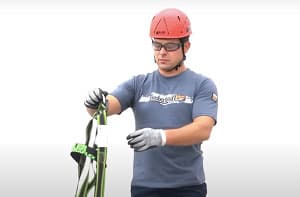
- The dorsal D-ring is the D-shaped metal hardware located on the rear side of the harness. Hold and lift it to let the straps drape. Then shake it to untangle the straps.
This step allows you to set up a safety harness so you can wear it easily. Plus, it lets you inspect the webbing and hardware for flaws.
- Undo the buckles and unloose the tension on any straps.
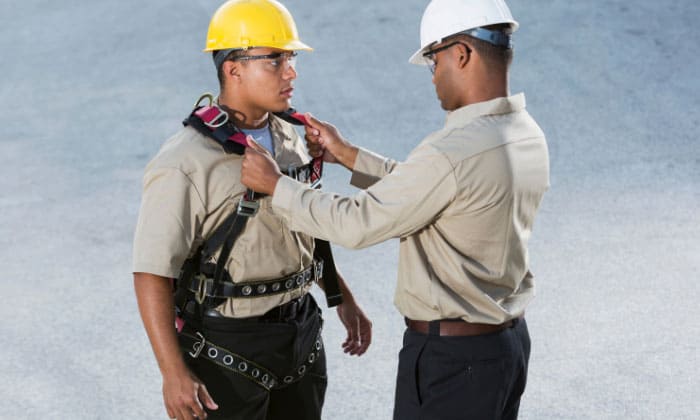
Step 2: Put on the shoulder straps
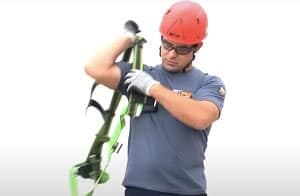
- Slip your arms and shoulders into the shoulder straps like you would with safety vests.
- Position the dorsal D-ring on the center of your back and between your shoulder blades. Also, make sure that your hand can reach it. Here’s why it’s important:
- When you use safety harness and lanyard during a fall, the dorsal D-ring will keep your body in an upright posture ensuring an even distribution of weight.
Step 3: Fasten the straps around the legs, chest, and shoulder
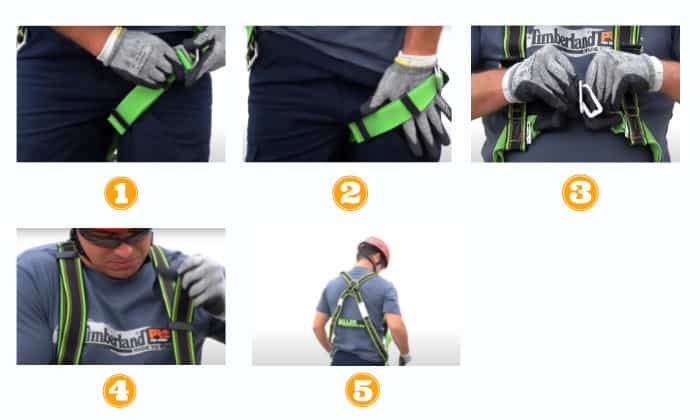
- Connect the leg straps and buckle them. Make sure they feel snug but not restrictive. You should be able to squeeze one hand between the strap and the legs. Anything tighter is not a correct way to apply this harness.
- Fasten the buckle of the waist strap if the harness has one.
- Connect the chest straps and adjust them until the shoulder straps rest firmly and squarely on your chest.
- Make the final adjustments around the straps, ensuring that the harness does not hinder movement.
- Tuck away the excess straps into the loop keepers so they don’t get caught in the machine or other objects.
Helpful Tips/FAQs
What is the first step of putting on a harness?
To put on a fall protection harness, the user should hold it by its dorsal D-ring found at the back and lift it. Next, shake it gently so that the webbings fall into place.
Why is correct fitting important?
Harnesses are supposed to limit the arresting force to 1800 lbs. Thanks to the straps and buckles, the harnesses can distribute the arresting force throughout the thighs and the torso since they are most capable of absorbing the impact. However, this is only possible if they fit properly.
Here are the risks when you wear full body harness with improper fitting:
- A tight-fitting harness can easily limit the worker’s blood circulation. Meanwhile, a slackened harness can risk falling further. Considering the significant amount of force, your body parts can rupture when they land on the straps.
- Injuries can also be caused by an uneven distribution of arresting force because the dorsal D-ring is either too high, too low, or sideward of your shoulder blades.
By the way, the D-ring on the back can move up and drag the chest strap upward as well, which brings us to the next point:
- If your chest strap is too high, it can impact your neck or jaw. If it is too low, you can slip out of the harness when you fall.
Conclusion
Whether it’s for hunting, protection on a roof, or recreational climbing, studies have shown that incorrect usage of harnesses has caused more damage than good. This goes to show that workers should never be deployed to great heights without knowing how to put on a safety harness properly and other protective equipment.
Beyond saving lives, training your workers about safety can also help them feel more confident in performing their tasks. In turn, this leads to increased productivity, which is good for your business!

Veronica is our content editor. She is a talent in delivery. Her main work is editing and writing articles that are both informative and simple to follow. She is in charge of synthesizing our understanding of what personal protection equipment (PPE) is needed in each job, how to best apply it, and how to visualize that equipment.