
Admit it or not, shoe-tying can be a real pain in the neck. Whether it’s the dizziness that comes from huffing and puffing as you bend over to lace up or those precious minutes that just fleet away while wrestling with a particularly stubborn knot, the struggle is real. It’s like an unwelcome daily chore crying out for a solution.
But what if there’s a way to bypass all these shoe-tying hassles? With the right techniques, you can actually learn how to lace your shoes so they slip on and say goodbye to tying those pesky laces every time!
Table of Contents
Ways to Lace Shoes So They Slip on
There are different ways to lace shoes to slip on, and each one requires a bit more time and effort to set up at first, but once done, they provide convenience— which is totally worth the effort.
1. The Basic Slip-On Lacing Method
The Straight bar lacing, also known as the Lydiard or Fashion lacing, is a basic and easy-to-learn lacing method. It is a go-to recommendation for those who value aesthetics, comfort, durability, and versatility.
With this lacing approach, your shoe can transform into a more relaxed fit, providing your foot with a bit of extra breathing space.
Here are the steps for the straight bar lacing method:
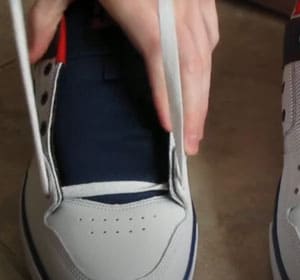
Step #1: Start with the base.
Insert the shoelace into the bottom-most eyelets, starting from the outside and threading inwards.
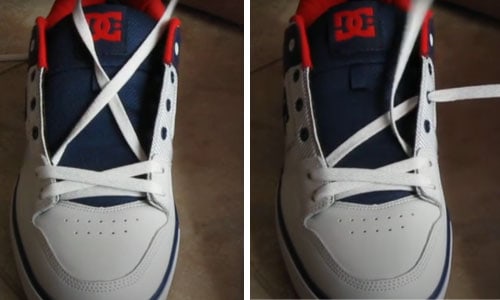
Step #2: Create a small bar.
Choose one side of the shoe to begin with. Take the end of the lace on that side and thread it upwards into the next eyelet. The lace should go from the inside of the shoe to the outside, creating a small vertical bar.
Step #3: Cross Over
- Use the same end of the shoelace to thread across into the opposite eyelet in order to create another straight bar.
- Make sure to maintain the outside-to-inside movement.
Step #4: Repeat steps #2 and #3 on the other side of the shoes.
Step #5: Continue the pattern until you reach the top of the show.
Step #6: Finish it off with a tight knot and tuck it inside the shoe to hide it from sight.
Pros:
- Clean, neat, and visually pleasing.
- The upper horizontal sections of the shoelace can be quickly cut through, enabling easy and rapid removal of a shoe in case of an injury.
- Makes the ends of the shoelaces seem longer.
- The laces are hidden, so there’s a lower chance of them getting snagged when walking.
Cons:
- On shoes with an odd number of eyelet pairs, this method results in a messy appearance due to the need for a workaround to make the string ends meet.
- Although the lacing appears symmetrical, it functions asymmetrically, which might become noticeable when tightening or loosening the laces.
- Military personnel would need to check if this method is in line with their specific regulations, as not all lacing methods may be permitted.
2. Advanced Slip-On Lacing Method
After getting a good grip on the basic slip-on lacing method, you might be ready to tie shoes for slip-on comfort and convenience on a whole new level.
The Advanced Slip-On Lacing Techniques, although more complex, offer a wide array of benefits, such as enhanced comfort, better shoe fit, and even a unique look for your favorite pairs.
Method #1: The Double Cross-Lacing Method
Step #1: Create the base.
- Start with the bottom two eyelets, and thread the lace through both from the outside to the inside of the shoe.
- This should leave you with the ends of the laces inside the shoe. Make sure both ends are of equal length.
Step #2: Cross and skip
- Take the end of the right-side lace, cross it over the shoe to the left side, and skip an eyelet before threading it through from the outside.
- Repeat the same with the left and of the lace, but cross it over to the right side of the shoe.
Step #3: Vertical and cross
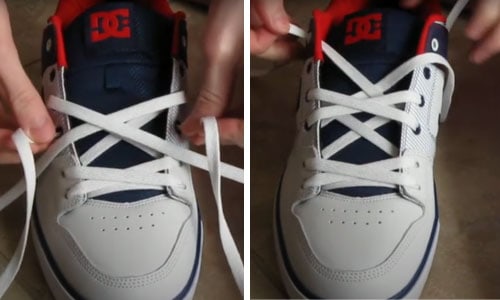
- Cross the ends of the laces on the outside of the shoe, and insert through the lower eyelet (the pair of eyelets you initially skipped).
- Continue this pattern by moving three rows upwards on the inside and one row downwards on the outside.
Pros:
- Unique and visually appealing pattern.
- The pattern allows for tension to be adjusted in different parts of the shoe for comfort.
- The method has several variations, allowing you to customize the lacing according to your preference or the number of eyelets on the shoe.
Cons:
- More complex than traditional lacing methods.
- Require longer shoelaces than other methods, which might not be ideal for shoes with shorter laces.
- Might also lead to inconsistent tension across the shoe, especially for people unfamiliar with the lacing method.
Method #2: Army Lace Style
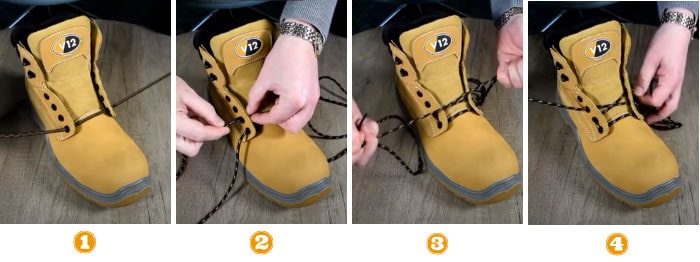
Step #1: Identify the number of eyelet pairs.
- Count the number of eyelets on your shoes.
- If you have an odd number of eyelet pairs, begin your laces straight across the outside and thread them in through the bottom eyelets. For even numbers, do the opposite.
Step #2: Run the laces straight up on the outside and then thread them in through the next set of eyelets that is one row higher.
Step #3: Cross your laces on the inside and then bring them out through the next set of eyelets that is one row higher.
Step #4: Repeat steps #2 and #3 until you have laced through all the eyelets, and your lacing is complete.
Pros:
- It offers a clean, symmetrical appearance, making it aesthetically pleasing.
- It provides a snug fit.
- The laces are less likely to get caught or snagged as they are not exposed on the outside.
Cons:
- Adjusting the tension can be a bit challenging due to the layout of the laces.
- It may not provide enough support for heavy-duty footwear such as hiking boots or work boots.
- It requires more length of shoelaces.
Aside from these lacing techniques, you can also turn sneakers into slip-ons using game-changing products that revolutionize the way you will wear your shoes so you’ll never have to tie laces again. These two products are lace anchors and no-tie elastic shoelaces.
Accessories to Turn Shoes Into Slip-ons
1. Lace Anchors
Lace Anchors are accessories that you can attach to your shoelaces so they don’t have to be tied.
Here are the steps on how they work:
Step #1: Get your Lace Anchor and thread the shoelace from the top side through the uppermost hole in the anchor.
Step #2: Pull the lace downwards so that the anchor settles beneath the uppermost eyelet of your shoe.
Step #3: Straighten out the lace to ensure it is free from any twists or kinks.
Step #4: Insert the lace into the bottom hole of the Lace Anchor, threading it from the bottom upwards.
Step #5: Feel for the tension created — this makes the lace less prone to shifting, effectively functioning like a tied bow without the need for actually tying one.
Step #6: Follow the same steps on the other side of the shoe to secure the lace symmetrically.
Step #7: Tuck the rest of the shoelace inside the shoe. You can tie them into a knot if you wish to.
2. Elastic Shoelaces
On the other hand, no-tie shoelaces for adults (and kids) are a fantastic solution for individuals seeking ways to lace shoes without tying. They are perfect for turning your lace-up shoes, including sneakers, into hassle-free, no-tie footwear.
Here’s how you can convert your regular lace sneakers into no-tie ones using elastic shoelaces
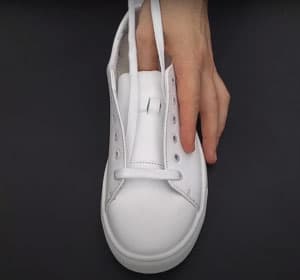
Step #1: Remove the old laces from one shoe.
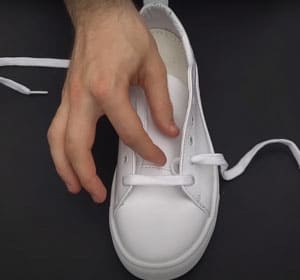
Step #2: Next, begin to lace your new elastic shoelaces through the eyelets.
- Use the remaining shoe’s pattern as a guide. Alternatively, feel free to employ your preferred lacing method.
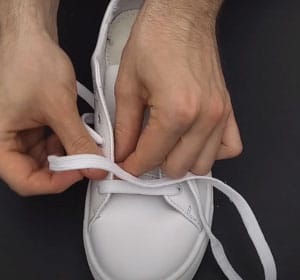
Step #3: Thread the metal lock onto your shoelace, ensuring that the screw side of the lock faces the plastic aglet at the end of the lace.
Step #4: Repeat the process on the other end of the shoelace.
- Make sure to align the screw with its counterpart on the opposite end before tying any knots.
Step #5: Adjust the laces.
- Put your shoe on, adjusting the laces until they’re as tight or as loose as you prefer.
- Once you’ve found the right fit, tie a knot near the screw side of the lock.
- Pull the knot tight enough so that it can slide into the cavity of the metal lock.
Step #6: Trim off any excess shoelace.
Step #7: Screw the metal locks together to secure them in place.
Frequently Asked Questions (FAQs)
Can any shoe be laced for slip-on convenience?
Yes, most lace-up shoes can be converted to slip-ons, and as you may have already gathered in the methods shown above.
Will slip-on lacing techniques affect the support and fit of my shoes?
Yes, slip-on techniques might compromise on the snug fit and support that traditional lacing offers, especially in athletic shoes.
Slip-on lacing methods often loosen the fit of the shoe because they don’t typically provide the same level of adjustment and firmness that traditional lacing techniques do. Consequently, you may experience less support around your foot and a looser fit overall, which can potentially lead to discomfort or foot problems, especially during prolonged wear or physical activity.
Which is better: Traditional Lacing Techniques vs. Slip-on Techniques?
The footwear industry is filled with alternatives to traditional shoelaces, such as converting lace shoes to Velcro. These alternatives may provide benefits for specific individuals, especially those who highly consider convenience.
However, for most people, traditional techniques still prove to be effective, especially in ensuring snug fit and support.
Additionally, the slip-on techniques and lacing alternatives have been attributed to children’s delay in learning how to lace their shoes, which is considered a fine motor skill. However, more advanced closure technologies could potentially improve foot health in patients with certain conditions, such as diabetes.
All in all, it is safe to conclude that the type of shoe closure isn’t as important as its functionality. In other words, as long as the closure secures the shoe to the foot, it won’t likely cause harm or injury.
What are the tips for choosing the right laces?
Choosing the right laces involves considering the following factors:
The Length
- The number of eyelets on your shoes determines the length of your lace.
The Type or Shape of the Lace
- Use flat laces when dealing with sneakers.
- Round laces are more suitable for boots.
Materials
- Synthetic materials are strong and fray-resistant.
- Natural fibers, such as cotton, offer a classic look but may not last as long.
Color
- It goes without saying, but pick a color that complements your shoe.
Troubleshooting common issues
There are issues that one can face in merely trying to tie their shoes, especially those concerning the overall fit and comfort. Some of the most common concerns are slipping heel, high arch, wide foot shape, or pressure on the big toe.
For these issues, you can try the following solutions:
- Slipping heel: secure your heel in place by creating loops at the last two eyelets of the shoe to “tighten” it.
- High arch: skip an eyelet in the middle to reduce the pressure on the instep
- Wide feet: lace your shoes more loosely so the laces can expand outward and create more room for movement.
- Pressure on the big toe: lace diagonally to create more space on the forefoot and relieve pressure on the big toe.
Are there self-lacing shoes?
Yes, there are self-lacing shoes available in the market. A notable example is the Nike Adapt series which uses advanced technology to self-adjust and adapt to the wearer’s foot.
The built-in motors allow you to lace Nike shoes by just pressing a button on the shoes or via a smartphone app. Indeed, this advancement in shoelacing technology provides a futuristic and highly personalized shoe-wearing experience.
Conclusion
By learning how to lace shoes so they slip on, you can definitely transform your footwear experience. The easy techniques you learned here turn traditional lace-ups into convenient slip-ons, streamlining your routine.
As you explore different lacing styles, you not only enhance comfort but also enjoy the simplicity of a tie-free life. So, lace it and forget it! Embrace the convenience, enjoy the comfort, and bid farewell to the daily task of tying and untying your shoelaces.
Read more: Step by step to lace work boots.

Veronica is our content editor. She is a talent in delivery. Her main work is editing and writing articles that are both informative and simple to follow. She is in charge of synthesizing our understanding of what personal protection equipment (PPE) is needed in each job, how to best apply it, and how to visualize that equipment.