
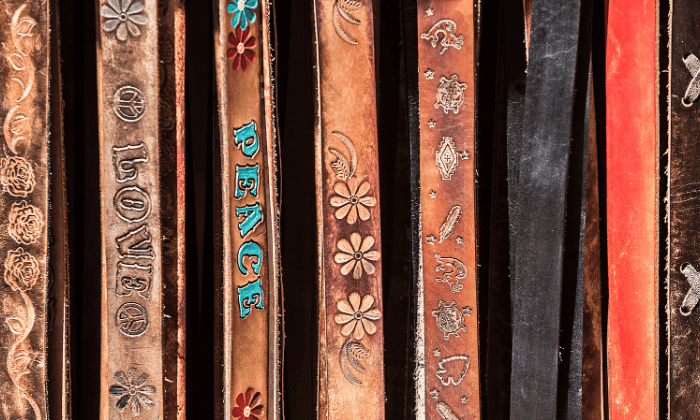
In the world of leather crafting, “tooling” literally means engraving shapes and patterns onto a leather fabric using tools like swivel knives, bevelers, and stamps.
These tools are available in most art supplies shops and online stores. More importantly, you don’t need professional-grade equipment to follow the instructions in this guide. You can learn how to tool a leather belt with a starter set and produce elegant designs.
Table of Contents
Step-by-step to Tool a Leather Belt at Home
What to prepare
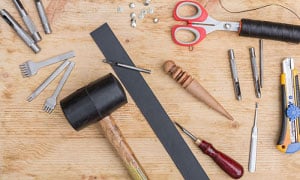
- Modeling tool starter set or these tools:
- Swivel knife
- Modeling spoon
- Beveler
- Basic stamps
- Modeling stylus
- Marble or granite cutting board
- Rubber mat
- Mallet
- Wax or tracing paper
- Printer
- Pencil and eraser, pens, or special leather pens
- Spray bottle filled with water, or a casing solution if you have one
- Scrap leather for practice
- Gloves
- Finishes, dyes, or acrylic paints
- Paper towel or wool dauber
- Paintbrush
Before you carve your belt
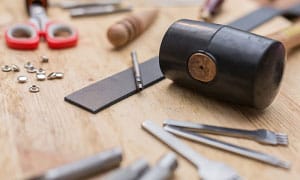
Step 1: Prepare your work area
- Gather all your tools on the table.
- Be sure to place a rubber mat underneath your cutting board to help reduce the noise from hammering stamps. Plus, it prevents the board from slipping.
- Render your leather tooling ideas digitally on Photoshop or any illustration app you have. Alternatively, select any of the free easy leather tooling patterns online.
Optional: You don’t need to use Photoshop or choose artwork online.
If you’re confident with your sketching skills, you can draw directly on the leather belt using a leather pen, a regular pen, or a pencil.
- Print the digital art on wax paper or tracing paper.
Step 2: Case the leather and trace your design on your belt
- Moisten the leather by spritzing water on it or dabbing the strap with a wet sponge. Just make sure to not soak the fabric.
Alternatively, you can apply the casing solution per the manufacturer’s instructions.
- Once the leather reverts to its original color, place the paper on the leather with its inked side facing upward.
- With a pencil or modeling stylus, trace the artwork ensuring that it will temporarily dent the surface.
Let’s start tooling!
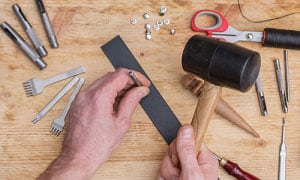
Step 1: Create the main lines

Get your swivel knife and start carving the leather belt, following the outlines of the pattern you drew or printed.
You do not need to cut deeply into the leather. Instead, aim to cut halfway through the fabric.
Essentially, the lines you’ve made at this stage will be the outline of the artwork. While it may look finished, you can still proceed to add details by following the next steps.
Step 2: Work on the details, textures, and shading
Using a beveler or modeling spoon, bevel the areas that you want to emphasize in the design by either making them appear lowered or raised.
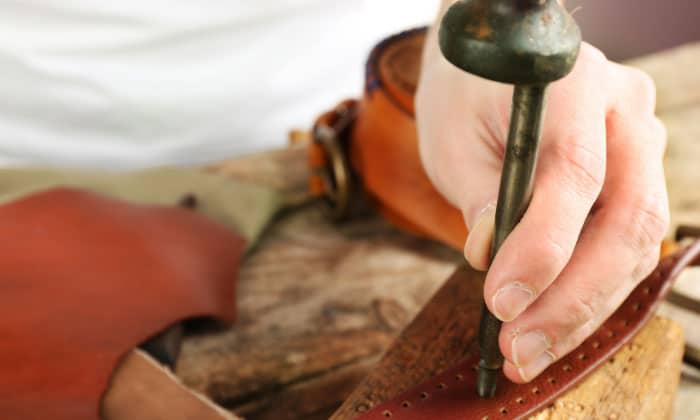
Next, incorporate textures or shading effects with your stamps. Hold the stamp vertically and tap it with your mallet gently to create impressions of the stamp’s shape or pattern.
Besides adding different effects, you can also use the stamps to create backgrounds.
Note that bigger stamps may need more force or a few more strikes. If you’re unsure, get a piece of scrap leather and practice stamping first to see the effects.
Step 3: Add the final touches and finish
Now is the time to improve your leather belt carving patterns. You can trim some lines further or add more textures and shadings until you’re satisfied with the overall design.
At this point, you can add the finish and call it a day. Wear your gloves and apply your choice of finish using a paper towel or a wool dauber.
However, you also have the option to color the impressions like the traditional tooled western belt! Simply apply leather dyes or watered-down acrylic paint on the belt with a brush.
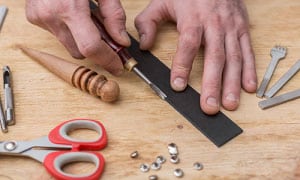
What is the Best Tool to Cut a Leather Belt?
For your leather belt DIY projects, you can use leather scissors, head knives, skiving knives, and rotary cutters. These tools are extremely useful if you want to make a leather belt loop, an entire belt, or any other item made of leather! From my experience, the rotary cutter featuring a sharp blade should be the best choice.
Related Guide:
FAQs
Can I make leather belts even if I’m a beginner?
Yes! Even the most seasoned crafters started out as beginners. If you’re serious about taking up this craft, you can start making small and simple things such as homemade leather belts and wallets.
Likewise, if you want to focus on leather tooling designs, try working on simpler imprints before creating something more complex.
The good news is that setting up your workstation and building a collection of leather fabrics and tools do not cost an arm and a leg. With starter kits, you can produce a plethora of projects.
What is the best leather for tooling?
You can carve on pretty much any type of leather but most artists choose vegetable-tanned leather. Thanks to its softness, you can easily carve and stamp on it to bring your leather tooling ideas to life.
Rawhide and bridle can be used as alternatives but the results will be slightly different than the ones etched on vegetable leather.
Besides the type of leather, you should also consider the thickness, especially if you are making items from scratch. Belts are typically made of thicker fabrics compared to the ones used for fabricating wallets.
Can I tool other leather items?
Yes, you can tool leather bags, wallets, shoes, saddles, and many more! Generally speaking, the process is the same. However, you may take more time to finish the carving and beveling on bigger items, especially if they are different types of leather.
Conclusion
First of all, congratulations on making it to the end of this tooling leather tutorial and producing your very first design! While it may seem easy to cut, carve, and stamp on a leather fabric, making sure that you do it precisely can feel daunting.
Since this article has covered the basics, take the time to read other reference books on how to tool a leather belt to learn more advanced techniques. Just like sketching and painting, it takes years before one can master this craft. However, practicing consistently will allow you to improve and work on intricate designs.

Veronica is our content editor. She is a talent in delivery. Her main work is editing and writing articles that are both informative and simple to follow. She is in charge of synthesizing our understanding of what personal protection equipment (PPE) is needed in each job, how to best apply it, and how to visualize that equipment.