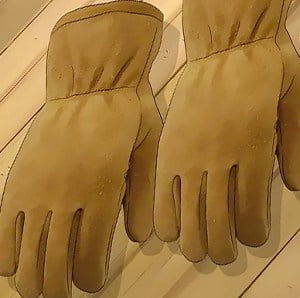
Shrink leather gloves? Is it possible? The answer is yes, but only with proper techniques. If you have just bought a brand new pair of leather gloves, but they fit a bit loosely, or if your old leather gloves start to stretch themselves over time and do not fit properly anymore, you are in the right place for the solution.
In this article, we will give you step-by-step explanations on how to shrink leather gloves. Briefly, you will need to soak the gloves in warm water, squeeze them and wait for them to completely dry. Most of the time, water is all you need to shrink leather gloves.
However, if that procedure doesn’t work, we’ve got another method, in which you will replace warm water with a homemade leather shrinking solution. Dive in to learn more.
Table of Contents
What You Will Need
You can shrink leather gloves in a few easy steps using what is already available at home. Quickly gather the following.
Your leather gloves
After a long time of use, commonly, leather gloves start to stretch. If your favorite pair of work gloves do not fit properly anymore, don’t immediately rush out to buy new ones. You can always try shrinking them at home using only water and common household products.
Before you grab your gloves and jump to the next step, remember to clean them thoroughly. This will make the shrinking procedure easier. If you are working with leather work gloves, make sure there is no grime, stains, and dirt left on the surface.
Clean warm water
Prepare a large bowl or basin of clean warm water.
A towel or soft cloth
Because leather gloves shrink when they are wet, you will need a towel or soft cloth to squeeze any excess liquid out of them. You can utilize a towel you have at home or even an old cotton T-shirt. However, a piece of more absorbent fabric, such as cotton, linen, and canvas, is preferred.
Sometimes, all you need is water to shrink leather. However, certain types of leather materials may require further steps. As said, we will provide two ways to shrink leather. To execute the first one, you only need your gloves, water, and a soft cloth. You can learn about the procedure in the second part of the article and try that first because it is easier. If the leather doesn’t shrink to the point you desire, go ahead and apply the second method, in which, besides those three items, you will need the following:
Rubbing alcohol
Rubbing alcohol is available in almost every drugstore. Both rubbing alcohol with a low or high concentration of isopropyl alcohol is alright. We only need the concentration to be higher than 70% to shrink leather gloves.
Liquid dish soap
Any liquid detergent that can be for dishwashing is suitable for this situation. Dishwashing liquid will help break down the oil on a leather surface, which assists in tightening the fibers of the leather.
A spray bottle
Spray bottles are a necessary household item because they can be used for a variety of purposes, like cleaning, ironing, and watering. In this case, we will need one to spray the liquid onto the leather surface. Go ahead and grab an empty spray bottle you have at home.
Steps on How to Shrink Leather Gloves
The procedure might not be difficult but it does take time. Nonetheless, we promise you, it’s worth it. As mentioned above, you can use two different methods to shrink leather.
Shrinking leather gloves with water.
Step 1: Soak leather gloves in water
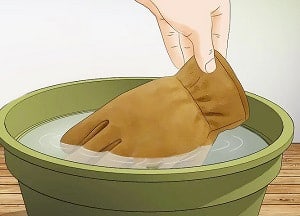
Fill a large bowl or basin with lukewarm water. Be careful not to use hot water since heat can stiffen and discolor the leather. Then, soak your leather gloves in the water for 5 to 10 minutes. Most leather gloves feature a thin waterproof layer on top, so you should regularly check to make sure the gloves are entirely soaked in the water. Feel free to wait a bit longer if necessary.
Step 2: Squeeze excess water
Take the gloves out of the water and squeeze them. Avoid wringing, crumpling, or twisting the gloves as doing so can cause damage to the leather surface. You should only squeeze softly several times; don’t forget the cuff and fingertips.
Step 3: Squeeze once more with a towel
To squeeze out as much excess water as possible, use a towel. Place the towel on a flat surface, cover the gloves with the towel, then gently press them with your hands. This step is necessary because once soaked in warm water, the gloves’ fibers are tightened. If you leave them dripping, they will lose that tightened form, and all of your work is gone.
Step 4: Dry
Now that your gloves are damp, let them air dry. Don’t hang them directly under the sun like regular fabric or use a hair dryer. Remember that you are drying leather gloves, and they require extra care.
Lay them flat on a clean solid surface or hang them from a line. Allow your gloves to dry naturally in a ventilated place. Avoid direct sunlight or external heat because, as mentioned, heat can damage and stiffen the leather. This drying process should take at least about 24 hours.
Step 5: Try them on
Here comes the moment of truth. Try putting your leather gloves on, spread your fingers wide, make a fist with your hand to see if they are well-fitted. If they do not shrink to the level you desire, go ahead and apply the second method.
Shrinking leather gloves with rubbing alcohol and soap.
Step 1: Make a leather shrinking solution
First, make a mixture of rubbing alcohol and clean warm water (equal parts of each). Again, the water should only feel warm, not hot. After that, pour the mixture into a spray bottle and add a few drops of liquid dish detergent. Finally, shake it well.
Alcohol and dish soap will help break down the leather’s oil, allowing them to shrink when soaked in water.
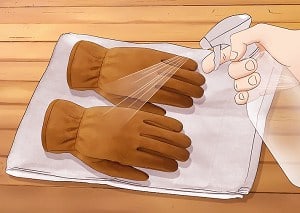
Step 2: Spray the gloves with solutions
Spray the gloves with a generous amount of solution. Make sure the whole leather surface is soaked in the solution; don’t forget the folds and fingertips.
Step 3: Wait
You will need to let them sit for about 5 to 10 minutes.
Step 4: Squeeze excess liquid with a towel
Spraying will not cause the gloves to be dripping wet, but you should also squeeze out any excess liquid from the gloves before letting them dry. Use a towel to eliminate as much liquid as possible. Remember not to twist or crumple the gloves.
Step 5: Dry
With this method, it won’t take long for the gloves to completely dry. The recommended technique for drying leather gloves is to hang them downwardly on a line in a ventilated place. While they are drying, you should put them on and off your hands several times to maintain their forms and make sure they won’t shrink too much.
Step 6: Try them on
If all went well, by now, your leather gloves should fit snugly. If you are shrinking leather work gloves, try wearing them while carrying out meticulous tasks to see if you feel comfortable, and if you can work precisely with them on.
Also, apply leather conditioners or leather’s vital oils to maintain their shape longer. Don’t forget to make assessments each time they cause you discomforts so you can make further adjustments later on.
If the gloves are still a bit loose, feel free to repeat the steps a few more times. Leather gloves can shrink more each time you perform these steps on them.
Conclusion
In conclusion, leather gloves shrink when they are wet, don’t just throw away your stretched leather gloves. Try these techniques to shrink them and get your well-fitted gloves back. This procedure to shrink leather gloves can also apply to other leather items, such as leather jackets, boots, or pants.
We are so glad to have your attention. If you found this article on how to shrink leather gloves helpful, don’t hesitate to share it with the people around you so that those in need can get the necessary help. Also, don’t forget to share your thoughts in the comment section. We can’t wait to hear from you!

Having worked in the field of personal protective equipment for over two decades, Andrew Carnegie is a specialist in the field.
At EDC, he strives to improve performance efficiency and promote workplace safety for EDC’s readers and customers. He also researches the most up-to-date equipment that has earned relevant accreditation for use in a wide range of industries and specialties.


