
Are you storing your rubber gloves correctly? Are you aware that detrimental bacteria will transfer to your skin when you wear mucky gloves?
Don’t throw your kitchen gloves in the sink or hang them over the faucet when they are still soggy. By doing so, you’re creating the perfect environment for mold and mildew to grow. Instead, use our handy guide:
- Step 1. When you finish using the gloves, wash and wipe them dry with a towel.
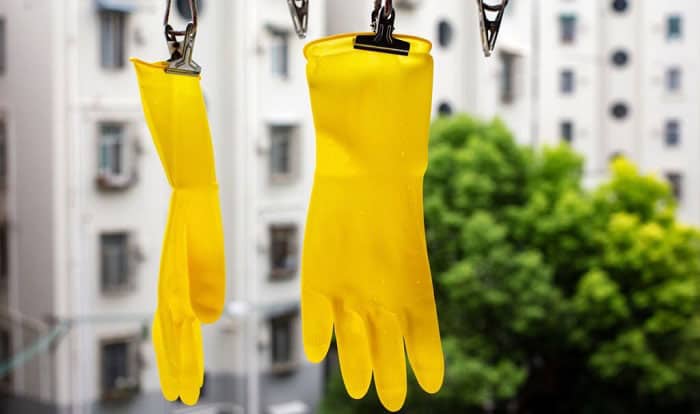
- Step 2. Use a cloth clip to hang them upside down (fingers facing the floor) in a ventilated place.
- Step 3. When the outside is dry, turn the gloves inside out to dry.
When you follow this simple procedure, your rubber gloves will stay fresh and bacteria-free for an extended period. Below, we have a step-by-step guide on how to store rubber gloves and four more pro tips.
Table of Contents
What You Will Need
People often hang rubber gloves over the faucet or on the side of the sink after use. Those are the wrong ways to store dishwashing gloves as they prevent the gloves from drying completely. Soon, mold and bacteria will develop, deteriorate the gloves, and leave an unpleasant smell.
Gather the following to store kitchen gloves appropriately:
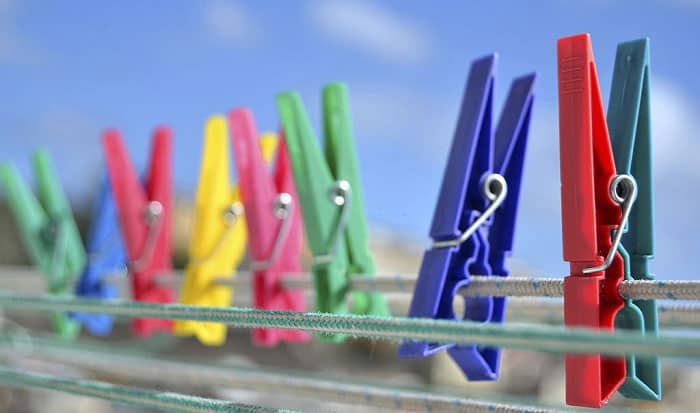
- A cloth clip or binder clip
- A command hook
Steps to Store Rubber Gloves
Step 1: Wash before storing
After you use kitchen gloves, the harmful and greasy substances stay on the rubber surface. If you don’t wash them with soap, the residue will accumulate and ruin the rubber. You will also touch this unhygienic surface when taking off and hanging the gloves. So, always wash before storing them. Use this procedure:
- While you’re still wearing the gloves, put some dish soap on them.
- Rub your hands together like you are washing your hands.
- Rinse off the soap.
- Wipe dry with a kitchen towel.
You can watch the steps here:
Step 2: Use a binder clip and a command hook

Adhere a command hook to the backsplash, wall, or inside of a cabinet door. The spot for kitchen glove storage should be away from direct sunlight, heat, moisture, and sharp objects. When you finish washing and wiping the gloves dry, take them off, clip the cuffs together, and hang them on the hook as in the picture below.
If you don’t like the idea of adhering a command hook to your cabinet, make a small washing line to hang the gloves.
Remember to keep your gloves away from heat sources. Heat hardens and shrinks rubber. If your kitchen gloves become brittle and tight only after a short period, you might have stored them incorrectly.
You should also keep them away from pointed and sharp objects (e.g., knives, scissors, forks) as they can cause punctures. It only takes one small hole for rubber gloves to be unusable.
Step 3: Dry the gloves’ inside

When the outside is dry, turn the gloves inside out. Even though the insides of rubber gloves usually feel dry, they’re not. Tiny water molecules can penetrate rubber.
Tips to Keep Rubber Gloves Smelling Fresh
It is annoying that rubber gloves develop odor quickly and easily. You forget to hang them up once, and the next time you put them on, they smell awful.
Such foul smells are signs that mold and bacteria have developed inside the gloves. Take action to keep your rubber gloves fresh so you won’t risk transmitting pathogens to your hands.
1. Tip number one – Deodorize with baking soda
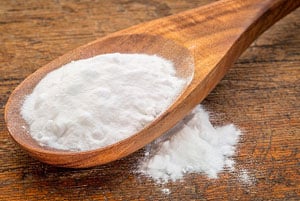
Put a decent amount of baking soda in a zip lock bag and place the rubber gloves in there. Leave it for a few hours or overnight. The powder will neutralize odor, absorb excess moisture, and kill bacteria. Then, take the gloves out, shake off all excess powder, and your gloves are good to go.
To save time, you can sprinkle some baking soda directly inside the gloves while hanging them to dry.
2. Tip number two – Sanitize with white vinegar
If you touch poultry or raw meat with the gloves, sanitize them. Make a mixture of half vinegar and half clean water. After washing and wiping dry your gloves with a towel, use a clean cloth to gently dab the solution to the rubber surface. Then, hang them to dry.
3. Tip number three – Use different gloves for the kitchen and bathroom
It is unhygienic to wash the dishes and scrub the floor with the same gloves. You should have several pairs for different tasks. You can buy various colors to distinguish them from each other and store them separately so each pair stays nice and clean.
4. Our last tip – Know when to get rid of the gloves
You should replace kitchen gloves every three to four months, depending on the kitchen glove usage and how you store them. The more often you wear them, the faster they will deteriorate. Proper storage helps them last longer.
Nonetheless, you need to get rid of the gloves if they show one of these signs:
- The color is too faded.
- They have an awful rubber smell that transfers to your hands.
- They are split, cracked, or torn.
- They are too stretched and loose.
When your gloves are old and damaged, using baking soda or white vinegar won’t help. Mold and germs must have formed inside and outside of the gloves. Continuing wearing them puts you at risk of contamination.
Conclusion
Rubber gloves are highly effective and cost-efficient to protect your hands from chemicals and dirt. Spend time taking care of them so they, in turn, take care of your hands.
Rubber takes five years to decompose. By learning how to store rubber gloves properly, you are putting less trash in the landfill. Always use a product to its maximum potential. Before you leave, tell your friends about this article so they won’t waste another pair of rubber gloves. Thank you for your attention!

Veronica is our content editor. She is a talent in delivery. Her main work is editing and writing articles that are both informative and simple to follow. She is in charge of synthesizing our understanding of what personal protection equipment (PPE) is needed in each job, how to best apply it, and how to visualize that equipment.