
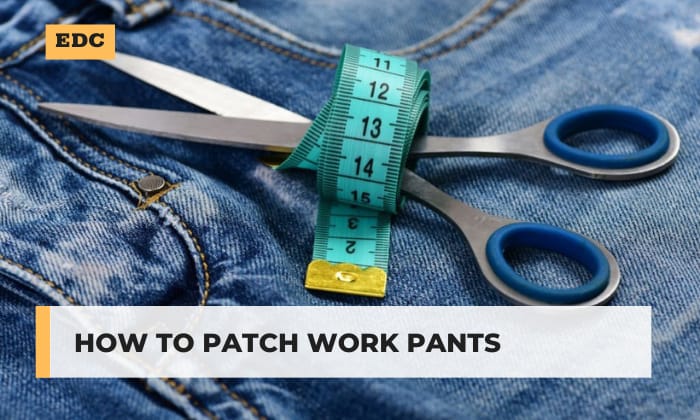
In a world where every task demands our utmost dedication and hard work, your work pants are something you can truly rely on. However, considering the purpose of this garment, it is inevitable that, in the long run, your work pants will begin to show signs of wear and tear.
The thought of holes in your trusty work pants can be disheartening and intimidating, especially if you are not a skilled seamstress. But don’t worry! With this guide, you will be able to learn how to patch work pants without breaking a sweat.
Table of Contents
Ways to Patch Work Pants
The Pre-Work
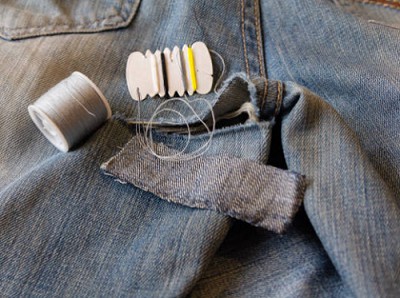
Before patching pants, you should locate where the damage is. It is advised to turn the pants inside out to really see how much damage needs to be repaired.
This will also help you to strategize on the best way to do the job, as well as the materials needed. There are two common ways of patching work pants: the darning and machine-sewn patch techniques.
Method #1: The Darning Technique
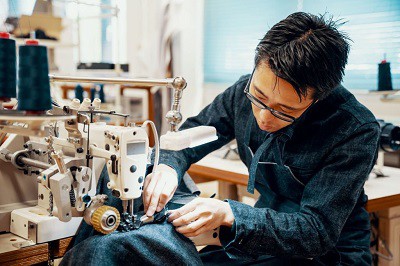
The darning technique is a traditional way to sew a rip in pants that is relatively small and unnoticeable. This method is a traditional way to patch pants by hand, but over the years, sewing machines have also been used.
The darning stitch weaves the threads in rows that are anchored on the opposite sides of the fabric and are crossed over the gap. Thus, creating a dense layer of thread that covers the holes.
In some cases, especially when using the sewing machine, the stitches are reinforced with fabric pieces called fusible interfacing. This ensures the patching is more durable without standing out on the pants’ right side.
For this method, you will need:
- Darning needle
- Thread
- A piece of fusible25 inch larger than the hole and iron(optional)
- Sewing machine (optional)
- Scissors
Step #1: Clean the edges of the hole.
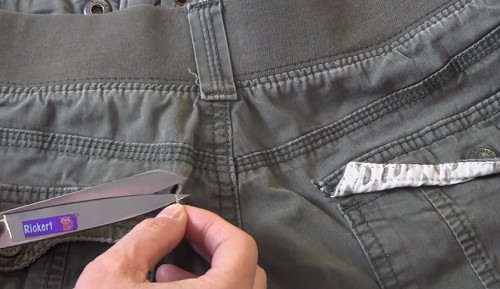
With the help of a pair of scissors, clean up the loose or hanging threads in the frayed area. Although this step is optional, it is still recommended, as the loose threads can get in the way of the whole patching process and affect the adherence of the patch to the pants.
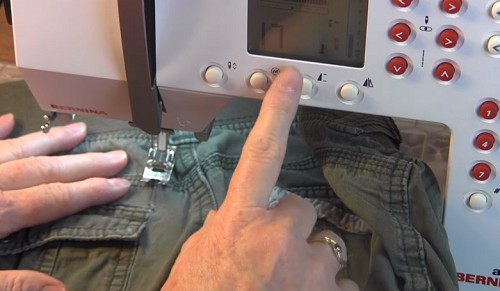
Step #2: Set up thread and needle
- If you are going to sew a tear in pants by hand, then all you have to do is thread the needle. Push the end of the thread through the eye of the needle and make the knot at the end to prevent the thread from slipping out of the fabric once you start sewing.
- For the sewing machine, attach the darning foot and select the appropriate needle and thread. It is recommended to run a few stitches on a “practice” fabric so you can adjust the settings of the machine, such as the thread tension and the evenness of the stitches.
Step #3: Secure the fusible (optional)
If using a fusible, place the fabric in the hoop or hold it taut with your hands to create tension and prevent shifting. Iron the fusible to keep it in place. Wait for the piece to cool down before peeling off the paper so only the webbing is left behind.
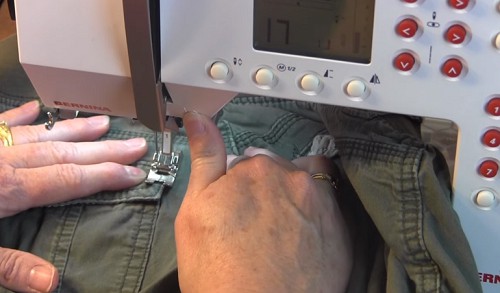
Step #4: Stitch it up!
Make sure that you are working on the right side of your pants before working on the stitches.
1. By hand
-
- Bring the needle up through the fabric at one edge of the hole. Then, take the needle across the hole and insert it back into the opposite edge of the fabric.
- Repeat this to create parallel rows of stitches until the hole is covered.
- Secure the thread on the fabric and trim any excess.
2. With Sewing Machine
-
- Sew parallel lines back and forth over the damaged area, covering all the surrounding fabric with stitches. The stitches should be right next to each other, forming rows.
- Optionally, for thicker fabrics, reinforce the existing rows by turning the fabric and stitching perpendicularly in order to create heavy duty patches.
Step #5: Finishing Touches
Carefully trim any excess threads to give the repaired area a neat and finished appearance.
Method #2: Machine-sewn Patch Technique
This method is commonly done to fix a hole that is particularly big. You may also choose this technique to patch a hole in the pants knee area.
Materials needed:
- Patch (fabric, iron-on)
- Thread
- Sewing machine
- Iron (optional)
- Ironing board (optional)
Step #1:Match the patch with the fabric
- Match your chosen patch to the fabric of your pants, as well as with the thread that you will use.
- Aside from this, also make sure that the patch is wide enough to cover the hole completely, with an additional ½ inch overlap on all sides to attach it securely.
Step #2: Secure the patch
Sewing pins are ideal for securing fabric patches. However, if using iron-on patches, activate the adhesive seam by ironing it to the fabric for about 60 seconds.
Step #3: Stitch!
- Sew a single row of stitches to attach and reinforce the patch.
- Follow the single-row stitches with zigzag stitches for extra durability and a neat finish.
Step #4: Finish it up
Trim the thread but keep the end long. Thread the long end through a needle and pull it through the fabric of the pants in order to secure it.
Frequently Asked Questions
Is it better to patch inside or outside of pants?
Patching your work pants inside is best recommended if you are going to fix a rip in pants using a fusible or scrap fabric. This way, the patches won’t be too noticeable.
On the other hand, if you are going to repair a hole with an iron-on patch, then do it on the outside.
Additionally, if you aspire to make hippie patchwork pants, you’ll find that most patchwork pants patterns instruct you to attach from the outside to make a bold and unique fashion statement.
Therefore, the position of the patch largely depends on the functionality, aesthetics, and the type of patch you’re using.
How long do iron-on patches last?
Using iron-on pants has been a popular remedy for pants hole without sewing. Now, if you’re thinking of taking on patching work with iron-on patches, you might be wondering how long they’ll actually last.
The traditional ones can last for 2-3 years. On the other hand, heat transfer vinyl (HTV) patches can hold up to 1-2 years. Lastly, adhesive-backed patches only stay put for 6-12 months.
Nevertheless, no matter what kind of patch you’re using, you can still extend its life by keeping it away from harsh washing and chemicals.
Conclusion
Patching work pants may seem like a daunting task, especially if you are not equipped with the right skill and knowledge. On top of that, you also need to make sure that you have the proper tools at your disposal to extend the life of this trusty garment.
However, it is important to remember the importance of “prevention is better than cure”. Knowing how to patch work pants is not an excuse for you to stop caring for and maintaining your work pants. At the end of the day, it is regular care and cautious handling that make work pants last longer.

Veronica is our content editor. She is a talent in delivery. Her main work is editing and writing articles that are both informative and simple to follow. She is in charge of synthesizing our understanding of what personal protection equipment (PPE) is needed in each job, how to best apply it, and how to visualize that equipment.