
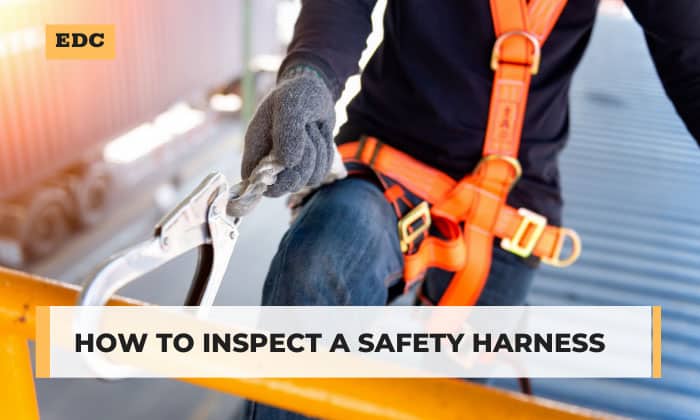
According to Occupational Safety and Health Administration (OSHA) in the US, the safety harnesses must undergo pre-use checks, detailed inspections, and interim inspections.
Granted, fall protection inspection requirements can feel like cumbersome paperwork but following these standards offers two key benefits. Firstly, it allows you to see whether the equipment needs to be taken out of service or not. Secondly, it ensures that the harnesses can effectively arrest a fall.
Here’s a comprehensive guide on how to inspect a safety harness:
Table of Contents
- Step-by-Step to Inspect a Safety Harness
- What to prepare
- Safety Harness Inspection Checklist
- Step 1: Before anything else, be sure to read the user manual.
- Step 2: Look at the labels or tags
- Step 3: Start from the dorsal D-ring
- Step 4: Move on to the webbings and stitches on the back side of the harness
- Step 5: Inspect the leg straps and the sub-pelvic strap
- Step 6: Check the front side of the safety harness
- Step 7: Record the inspection findings
- FAQs
- Conclusion
Step-by-Step to Inspect a Safety Harness
What to prepare
- User manual
- Safety harness
- Safety harness inspection checklist:
The manufacturer of your safety harness can provide you with a checklist template. But for the purpose of this tutorial, you can use an OSHA harness inspection checklist or the one provided here.
Safety Harness Inspection Checklist
| Name of Inspector | ||
| Date of Inspection | ||
| Date of First Use | ||
| Date of Manufacture | ||
| System Number | ||
| Serial Number | ||
| Safety Harness Inspection Checklist | Pass | Fail |
| Check if the inspection records are up-to-date | ||
Check the fall impact indicators for rips in the stitches |
||
| Tags or Labels | ||
|
||
|
||
Metal and plastic hardware |
||
|
||
For harnesses with buckles: |
||
|
||
|
||
|
||
|
||
|
||
|
||
For harnesses with quick-connect buckles |
||
|
||
|
||
|
||
Fabric and stitching |
||
|
||
|
||
|
||
|
||
|
||
Step 1: Before anything else, be sure to read the user manual.
The user manual of a safety harness contains model-specific information on the components and instructions for inspection, usage, and maintenance.
As such, workers should take the time to read and understand it before inspecting, cleaning, or donning the safety harness. This way, they can prevent misusing the equipment, which can lead to serious injuries or fatal accidents.
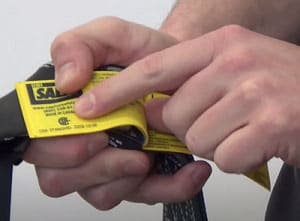
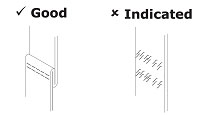
To begin inspecting fall protection equipment, check the serial number, model number, manufacturing date, and warnings on the labels. Some local manufacturers may also indicate the specific safety standards it meets. In Canada, for instance, look for the CSA standards.
All of this information must be legible.
Step 3: Start from the dorsal D-ring
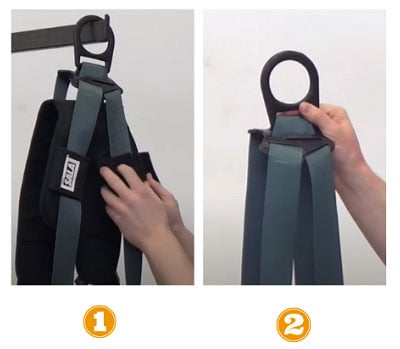
Remove the paddings attached to the straps as they may be concealing some defects when checking a safety harness.
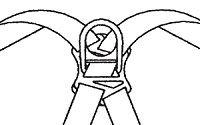
Then, look for any cracks, dents, corrosion, pitting, and sharp or abrasive edges on the dorsal D-ring on the back of the harness. You can run your fingers through the metals to feel the damage.
Move the webbing that wraps the D-ring to see if there are defects in those areas. Make sure you inspect the plastic back D-pad that is attached to the D-ring for cuts, deformities, or any sign of wearing.
Step 4: Move on to the webbings and stitches on the back side of the harness
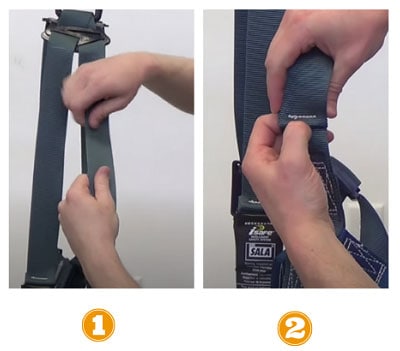
Conduct a visual and touch inspection on the webbings on the backside of the harness.
Check if there are any cuts, frays, abrasions, or damage caused by heat, chemicals, and UV.
Pay attention to the stitchings on the fall impact indicators:
- If these stitchings are torn or pulled, it means that the harness was involved in a fall.
- If it’s intact, then proceed to check the other stitching patterns to find pulled or missing stitchings.
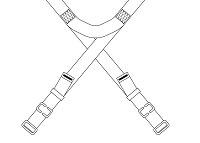
Step 5: Inspect the leg straps and the sub-pelvic strap
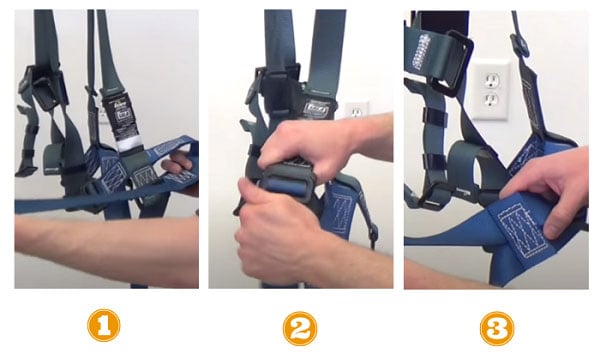
Look at the metal hardware and check for irregularities using the same technique in Step 3.
Test the buckles to see if they can engage securely and disengage smoothly.
Note that every safety harness model is equipped with different types of buckles, so consult the manual for specific instructions.
Inspect for flaws in the webbings and stitchings of the leg straps and sub-pelvic straps following the same process in Step 4.
Step 6: Check the front side of the safety harness
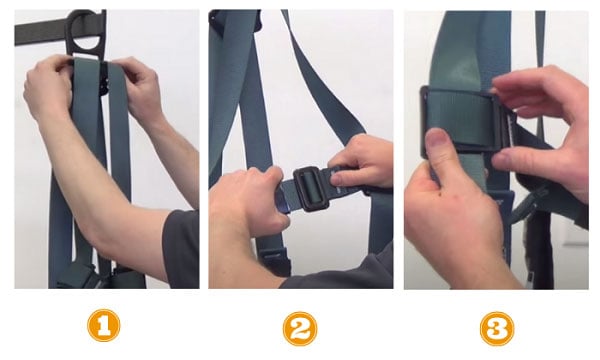
Flip over the harness and start inspecting all the webbings, stitchings, and plastic and metal hardware on the front side.
Start from the top then work your way down using the methods shown in Steps 3 and 4.
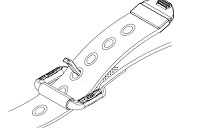
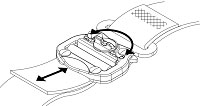
Don’t forget to check the chest strap and test its buckles. Ensure that you can pull the strap positioners up and down the webbing.
Expect that these components are not easy to move since they are supposed to hold the chest strap securely in position. However, they should budge with a bit of force.
Moving the positioners not only allows you to see if they work but also lets you inspect the webbing underneath them.
Finally, fasten all the buckles and give the harness one last scan.
Step 7: Record the inspection findings
Once all parts are checked, record the findings on the fall protection inspection form.
When rating each component, you should always use “Pass or Fail”—no “buts or ifs”. The harness should be taken out of service if:
- Defects and damages are found
- It was subjected to a fall.
- The labels are illegible.
- The manufacturer instructs you to withdraw the harness from service after five years, regardless of its condition.
FAQs
When performing a harness inspection, what should you look for?
Companies should have a checklist from the harness manufacturer or a competent person. This includes all the components that you need to inspect, including tags, labels, webbings, strap positioners, buckles, fabric, and stitchings.
Where do you look for inspection information on a supporting harness?
Free safety harness inspection checklists are widely available online. Even so, OSHA, ANSI, the safety harness manufacturer, and your employer should be your priority. Here’s why:
- Both OSHA and ANSI set workplace safety standards, including harness inspections. However, OSHA serves under the US government’s department of labor, which means that defying their regulations can result in fines and imprisonment.
- Complying with ANSI, a private organization, is voluntary but equally important as its recommendations fill the discrepancies in OSHA’s regulations.
- Ultimately, OSHA and ANSI cover only the baseline for fall protection standards—this is where the manufacturer’s harness inspection recommendations come in. After all, they are the ones who are most knowledgeable about the equipment.
How often the inspection is done will depend on your company’s designated competent person who will assess the risks associated with your job.
Can you inspect your own harness?
Every worker using the harness is required to perform ‘pre-use checks.’ So, if you work at a height, you should receive training on fall protection and be able to conduct this type of inspection.
Other than you, who can inspect safety harness? For your information, the safety harnesses are also subjected to detailed inspections and interim inspections conducted by a competent person, such as another certified staff.
Conclusion
Even though this guide on how to inspect a safety harness seems long, it only takes 5 minutes to actually check each component. It’s a vital step to prevent injuries and deaths.
If you have doubts about inspection procedures, you can always consult the manufacturer’s representative and your company’s competent person. Thanks to their years’ worth of experience and training, they can give you advice that’s appropriate to your situation.

Veronica is our content editor. She is a talent in delivery. Her main work is editing and writing articles that are both informative and simple to follow. She is in charge of synthesizing our understanding of what personal protection equipment (PPE) is needed in each job, how to best apply it, and how to visualize that equipment.